Use the Right Symbol Reference for the Product
Chart symbology is a language with published conventions, but its appearance can vary across products and displays. Identify the hydrographic authority, chart type, and equipment portrayal before selecting a reference. United States Chart No. 1 explains symbols, abbreviations, and terms associated with relevant nautical chart portrayals. A recreational app may also provide its own legend or object information. Keep those resources available in a form you can use without a connection. Guessing from a remembered image is less reliable than checking the reference that actually describes the mark on your screen.
Do not treat the reference as something to read once and memorize completely. Learn frequently used groups, then build a habit of checking unfamiliar details that affect the route. A small distinction between two similar hazard symbols can matter more than remembering many obscure abbreviations. Keep the reference easy to search or index. Training with examples from your operating area helps you learn which categories deserve the most attention. The goal is accurate interpretation at the point of decision, supported by an understanding of what remains uncertain.
Read Depth Information as a Connected Group
| Mark or abbreviation | Meaning | Reading limit |
|---|---|---|
| S / M / R | Sand / mud / rock seabed descriptions | A bottom description does not certify anchor holding. |
| Wk / Obstn | Wreck / obstruction | Read its symbol, least depth, and attributes together. |
| Fl / Oc / Iso | Flashing / occulting / isophase light | Include grouping, color, and period. |
| R / G / W beside a light | Red / green / white | Context matters: R can mean rock in a seabed description. |
Soundings are numerical depth information, while contours and depth areas help describe the bottom around them. Confirm units and reference levels in the product before interpreting the values. A similar-looking number on another chart may use a different unit or portrayal. Some displays allow conversions or configurable safety shading, which introduces another setting to understand. Identify the underlying information and the selected display convention separately. The question is how much suitable water the vessel can reasonably expect, rather than whether a familiar color happens to appear along the route.
A drying area or feature needs particular care because its relationship to water level differs from a feature always submerged under the stated conditions. Consult the reference for the actual notation rather than assuming every number near a rock is an ordinary depth. Read relevant tide or water-level information using compatible references. A feature that is visible at one stage may be covered later. This makes the symbol useful even when the object cannot be recognized easily from the boat.
Bottom descriptions can help with tasks such as selecting an anchorage, but they are not a guarantee that every patch of seabed is identical. Learn the abbreviations used for the product and interpret mixtures or modifiers through the reference. A bottom label does not remove the need to select suitable equipment and test holding. Keep the purpose of the information clear. It describes surveyed or reported characteristics within the chart’s limitations, rather than certifying a particular anchor or maneuver at any time.
Distinguish Hazards by What Is Known About Them
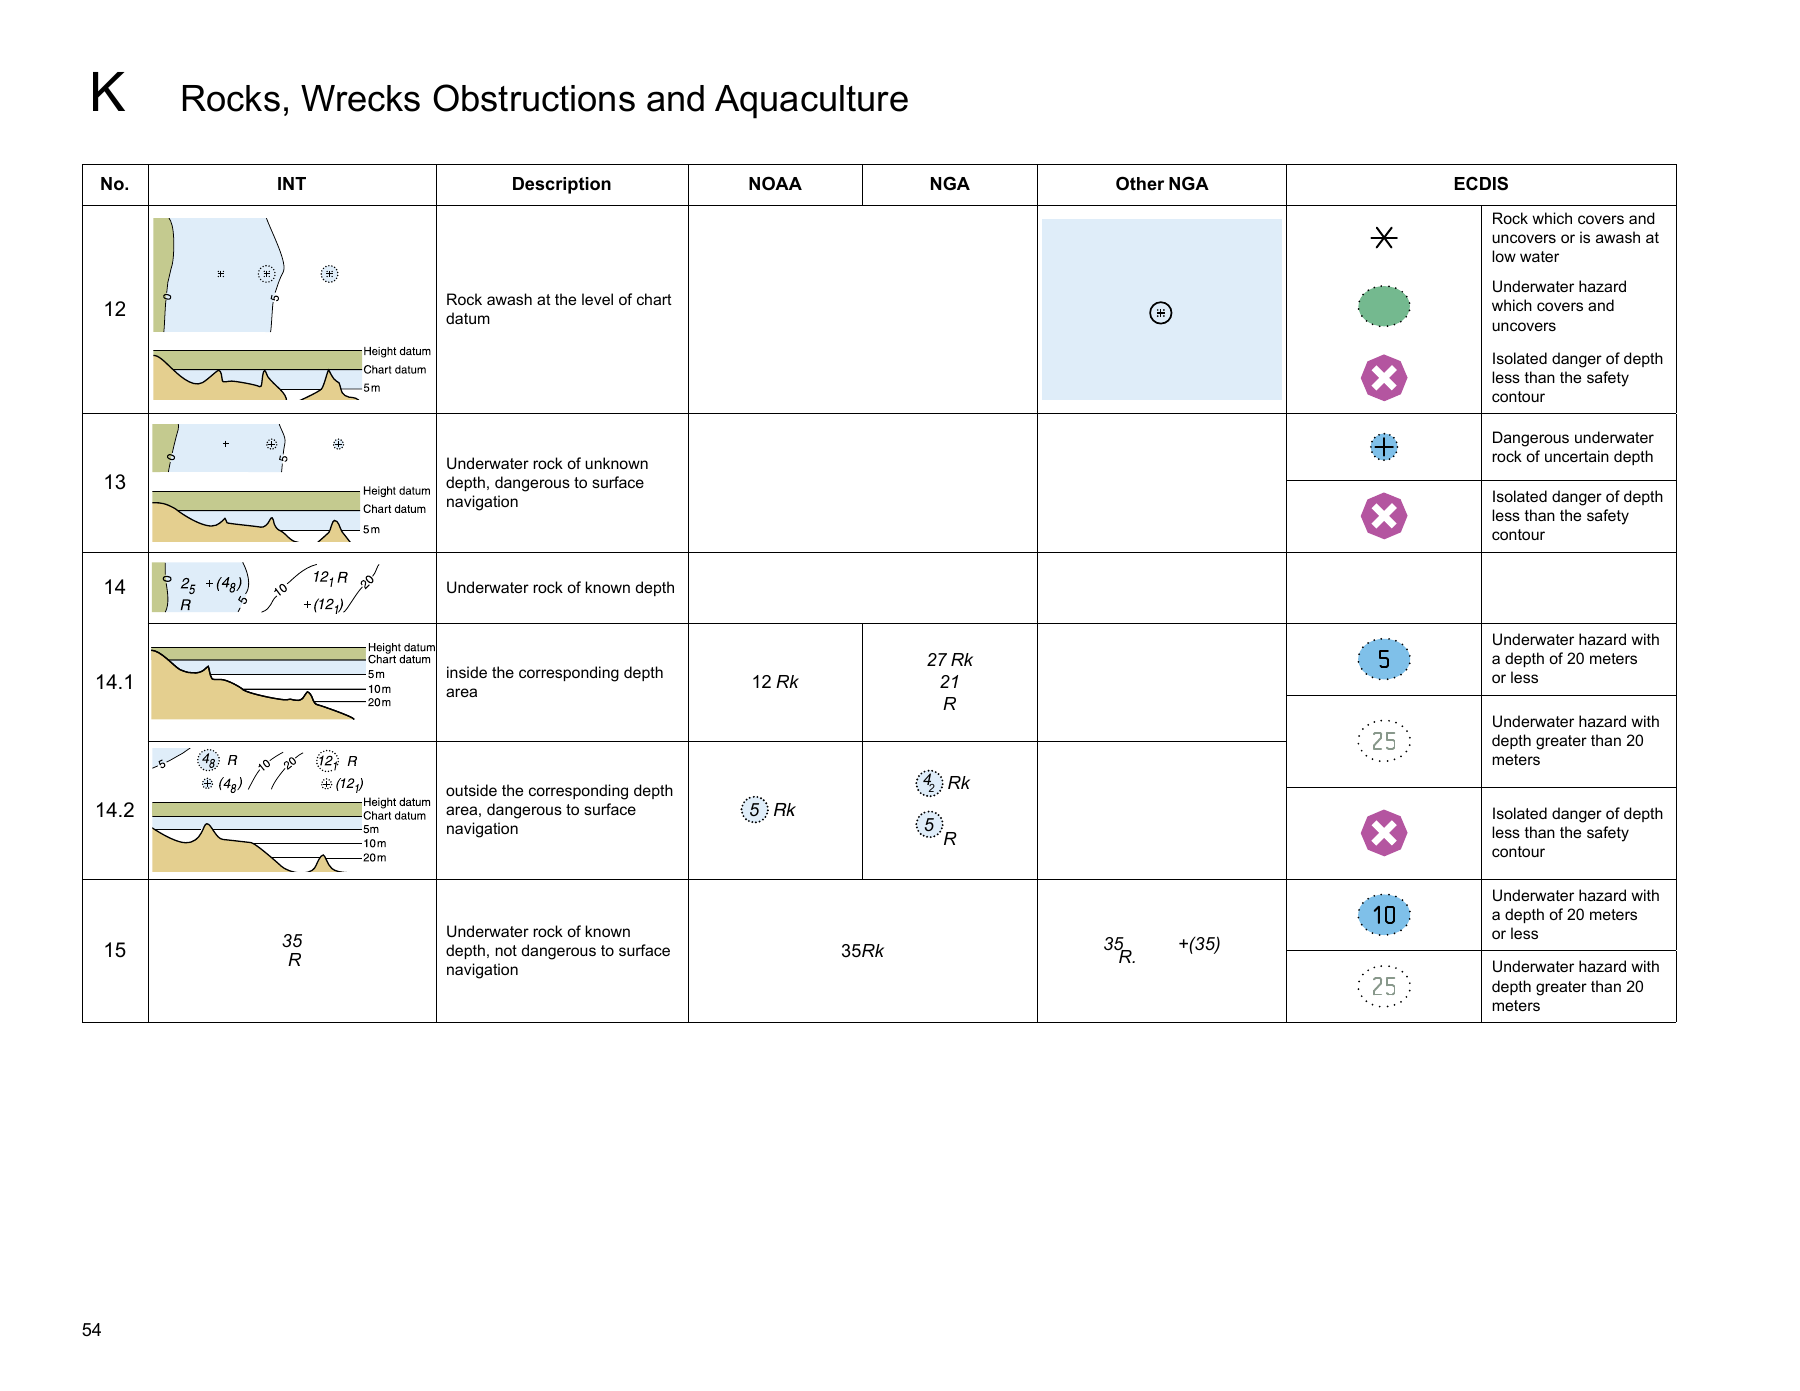
Rocks, wrecks, and obstructions can have different symbols depending on their characteristics and the information available. Some have associated depths, while others indicate uncertainty or a different relationship to the water surface. Examine the complete mark and any linked information. Do not assign the same clearance to every small hazard symbol simply because they occupy similar screen space. The physical extent and the reliability of the available depth information can differ. If interpretation affects the route, resolve it before approaching.
A mark’s plotted center should not be treated as the full edge of the hazard. Read any area depiction or attributes that describe its extent. Leave an appropriate margin for the boat, conditions, positioning, and data limitations. A wreck may cover more space than the graphic suggests, especially at a broad scale. Likewise, a small rock symbol can represent a feature that deserves substantial clearance. Symbol size is a portrayal choice and is not a universal measurement of the object in the water.
Uncertainty is information rather than a reason to choose the most convenient interpretation. If a depth or position is doubtful, the route needs a margin or an alternative that addresses that limitation. Additional local information may help, but it should be assessed for currency and relevance. Following another boat close past the mark does not resolve the chart’s uncertainty for your vessel. Its draft, exact track, and knowledge can differ. Preserve space to investigate rather than letting curiosity draw the boat toward a poorly understood hazard.
Practice comparing similar symbols side by side in the reference. Explain what changed and why the difference affects planning. This method is more useful than learning a list of pictures without context. An instructor can help distinguish a genuine chart convention from a product-specific drawing. When a new display looks different, return to the attributes and legend. The information you need is the feature’s meaning, not loyalty to one familiar icon.
Separate Real Navigation Aids From Their Charted Portrayal
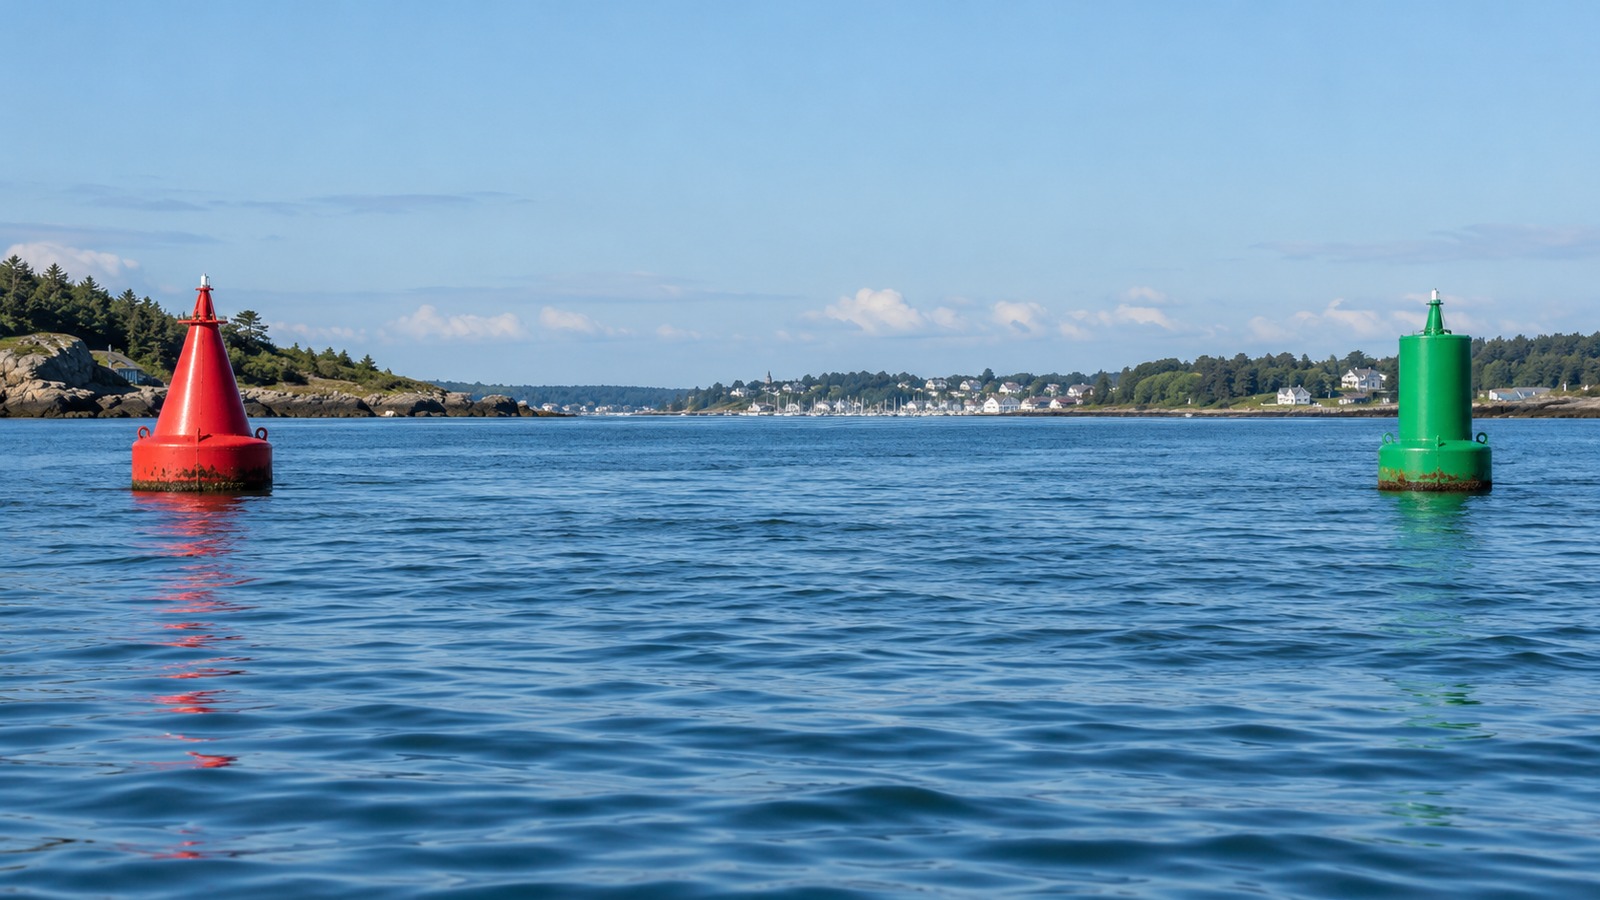
A charted buoy or beacon combines position and identifying information with the aid’s navigational purpose. Match the chart with the actual feature using relevant attributes such as shape, color, numbering where present, and light characteristics. Confirm the applicable regional system and direction conventions. A color slogan without that context can lead to a wrong assumption. Floating aids can also move within their mooring area or be reported off station. Use current notices and appropriate clearance. The chart’s portrayal helps interpret the waterway; it does not make the aid a fixed object that can be approached without judgment.
Read a Light Description as Several Pieces
A light description can combine its rhythm, color, period, height, and range information, according to the product. Read those elements in their proper order with the relevant reference. The period describes a repeating cycle rather than simply the length of time the light stays bright. Similar lights can differ in rhythm or grouping even when they share a color. Establish which feature the complete description identifies. A single red or white light among a busy waterfront is not enough to establish the boat’s position confidently.
Height and range have specific definitions that should be checked in the reference and associated publication. A stated nominal range is not a promise that you will see the light at that distance in every condition. Visibility, the observer’s height, obstructions, and other factors affect detection. Do not use a light’s absence as automatic proof that you are in the wrong place, or its presence as proof of exact distance. Combine it with other appropriate navigation information.
A hypothetical label Fl(3) W 10s 15m 8M describes a white light flashing in groups of three, with a ten-second complete cycle, a charted height of 15 meters above the stated height datum, and nominal range of eight nautical miles. The capital M and lowercase m do different jobs. This is a decoding exercise, not the description of a particular current aid. Common light abbreviations illustrate why the letters matter. Fl identifies flashing, Oc identifies occulting, and Iso identifies isophase, in which the light and dark portions have equal duration. Read any grouping and period alongside that description, and confirm the convention in the appropriate official light information. These terms identify a pattern rather than a complete position. Practice recognizing the sequence over several cycles with qualified guidance instead of deciding from a single glimpse.
For United States waters, the Coast Guard light-list resources provide further aid information. Use the current relevant material and navigational notices for the actual voyage. An old example remains useful for learning the notation but should not be treated as a present description of an aid that may have changed.
Learn Area Boundaries Without Treating Them All Alike
Dashed lines, tinted areas, and boundary labels may describe very different purposes. They can mark restrictions, anchorages, channels, traffic arrangements, cables, pipelines, or other information. Read the associated wording and object details rather than assuming every dashed line is merely a suggested route. The applicable activity may matter as much as the vessel’s ability to pass physically through the water. A cable corridor, for example, can affect anchoring decisions even when the water is deep enough for navigation.
Check the authority behind an area restriction and obtain current information when it affects your plans. Temporary works or security measures may not be explained fully by an older static view. A chart is part of the information set rather than a complete statement of every current operating condition. Keep notices and local instructions with the route plan where relevant. If a boundary’s meaning is uncertain, choose a safe place to resolve it before proceeding into the area.
Traffic arrangements need their own study. A line or arrow on the chart can describe a scheme or recommended movement, but it should not be interpreted through appearance alone. Learn the applicable rules and vessel obligations with qualified instruction and current official material. Do not infer that following an arrow removes the need for lookout, safe speed, or collision-risk assessment. The purpose of identifying the symbol family is to locate the correct further information, not to reduce a complex operating rule to one graphic.
Use Shore Features to Connect the Chart With the View
Conspicuous towers, buildings, coastlines, and other land features can support position checks when correctly identified. Compare their location and relationship to nearby features rather than using the first similar shape you see. Shore development can change, and a feature that stands out on the chart may be hard to distinguish against a busy background. Select suitable references in advance where possible. If visibility or lighting prevents confident identification, use another method rather than forcing a match.
Photographic familiarity has limits too. A headland viewed from the opposite direction can look unlike the image remembered from departure. Look at the chart’s spatial relationships and expected bearing, while keeping the boat clear of hazards during the check. Learn the difference between a useful conspicuous feature and an ordinary building depiction. The reference explains the convention, while experience and instruction help you use it sensibly in the local setting.
Reveal Electronic Attributes Before Concluding Information Is Missing
Vector charts can store details that are not all visible in the selected display mode. Learn how the equipment opens object information and how filtering, zoom, or safety settings affect portrayal. A small graphic may lead to a fuller description of a hazard, light, or area. Read the manufacturer’s instructions and practice while safely secured. Do not assume that everything relevant is shown in the default view, or that adding more visual clutter always creates a better picture. The useful display supports an understood route and timely recognition of important features.
Build Familiarity Through Short Interpretation Exercises
Choose a small chart area and group the marks by function. Identify a depth pattern, a hazard, an aid, a boundary, and a shore feature. For each, explain what you know, what the reference adds, and what still requires current information. Avoid starting with the most complicated harbor on the coast. A manageable exercise makes it easier to notice the modifiers that change meaning. Compare your interpretation with qualified instruction before turning it into a real passage plan.
On suitable supervised outings, match a few expected features with observations and review any disagreement afterward. Keep a personal list of conventions that caused confusion, with the correct reference rather than an invented shortcut. The NOAA Office of Coast Survey provides access to chart products and learning references for United States waters. Use the corresponding hydrographic resources elsewhere. Accurate symbol reading grows from grouping information, checking modifiers, and respecting uncertainty, with the chart and the real water continuously compared.